How to Properly Bin Hair
~~ This is a work in progress!!! Suggestions welcome! ~~
~~ Must be familiar with SimPE! And remember to always BACKUP! ~~
To make things easier, it is suggested that you separate your hair files into folders with their 6 corresponding colors before beginning (i.e. Black, Red, etc). I did this with the Sims2Pack Clean Installer. It isn't necessary and if there are some you are unsure about, you can tackle them later. I have problems with Brown & Red most often.
Since version 0.58, the plugin for genetics was changed. To follow this guide you will have to turn off the plugin.
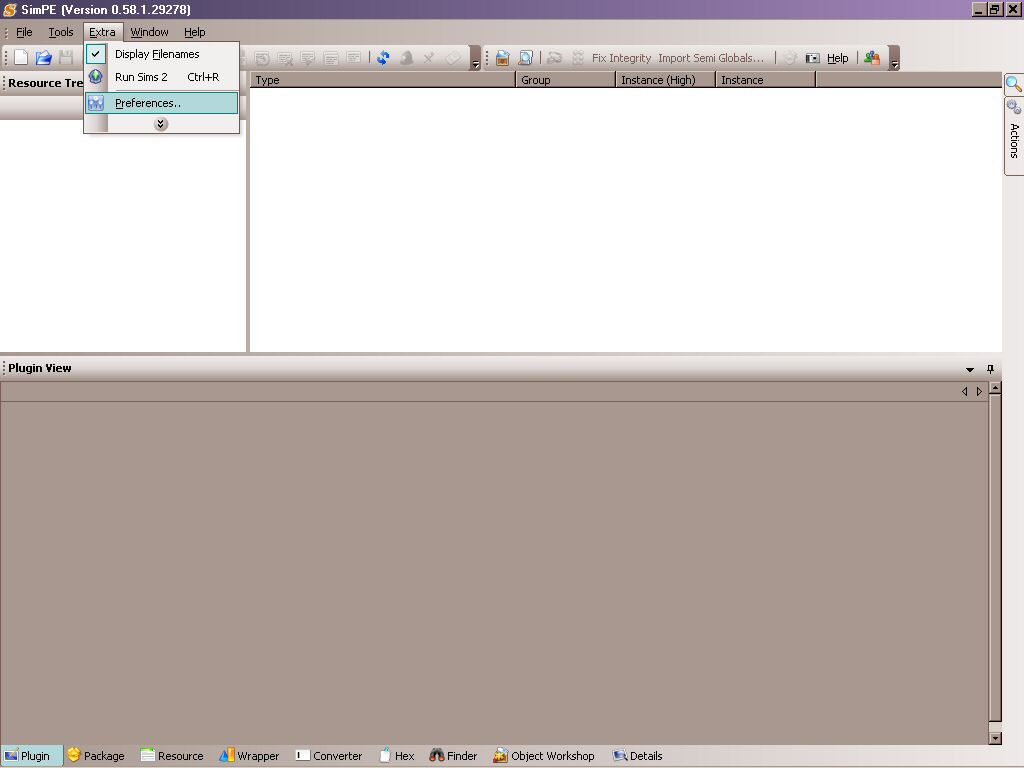
Open SimPE. Go to Extra -- > Preferences.
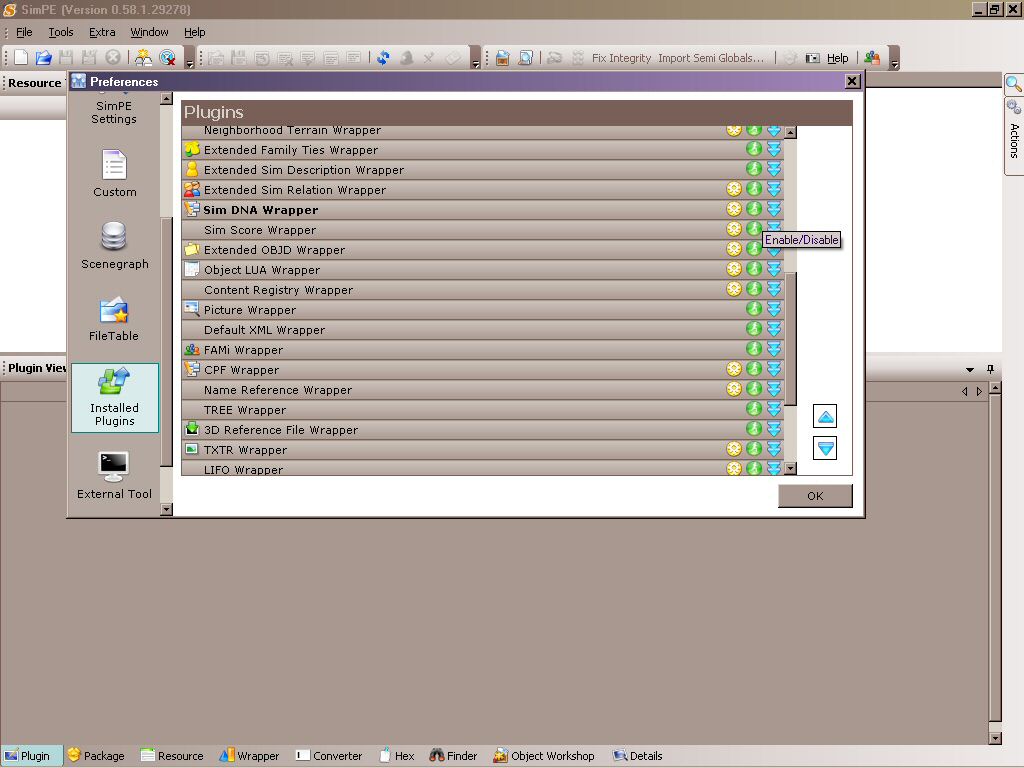
A new window will open and on the left hand side scroll down until you see Installed Plugins. Click on it. The window on the right hand side will change. Scroll down through the window on the right hand side until you see the Sim DNA Wrapper. Click on the green button next to it to disable it. The button should turn red. Click the Okay button at the bottom and we're done with this part.
Once you have determined the color of the hair, go to the Hair Tone XML and click on the Hair Tone file in the right hand pane. A new window will open up on the bottom and the three 'lines' we are worried about here are; Name, Genetic, and Proxy.
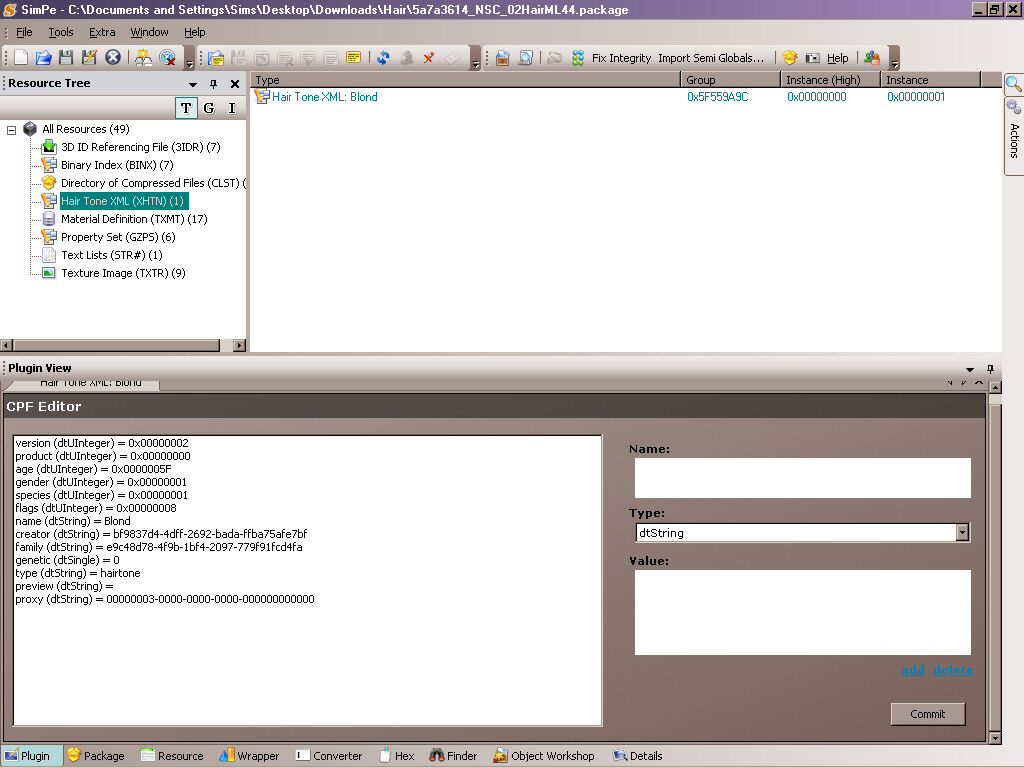
- Change the Name to the proper hair color (i.e. Black, Brown, Blond, Red). Only use one of these four otherwise it will break the file.
- Change the Genetic from 0 (zero) to either 1 (for black/brown hair) or 2 (for blond/red).
- Change the Proxy to the correct color:
00000001-0000-0000-0000-000000000000 = Black hair
00000002-0000-0000-0000-000000000000 = Brown hair
00000003-0000-0000-0000-000000000000 = Blond hair
00000004-0000-0000-0000-000000000000 = Red hair
00000005-0000-0000-0000-000000000000 = Grey Hair
Click the commit button. We're all done with this part.
Next we're going to head to the Property Set. Each Property Set represents a different age group. There will be either 5 or 6 files depending on whether or not the hair is university enabled or not. If the creator has done his or her job, there may be less if they removed the unused age files. Click on the first property set and in the window at the bottom the two lines we are worried about here are; Genetic and hairtone. Change these two the same way you changed them in the XML file.
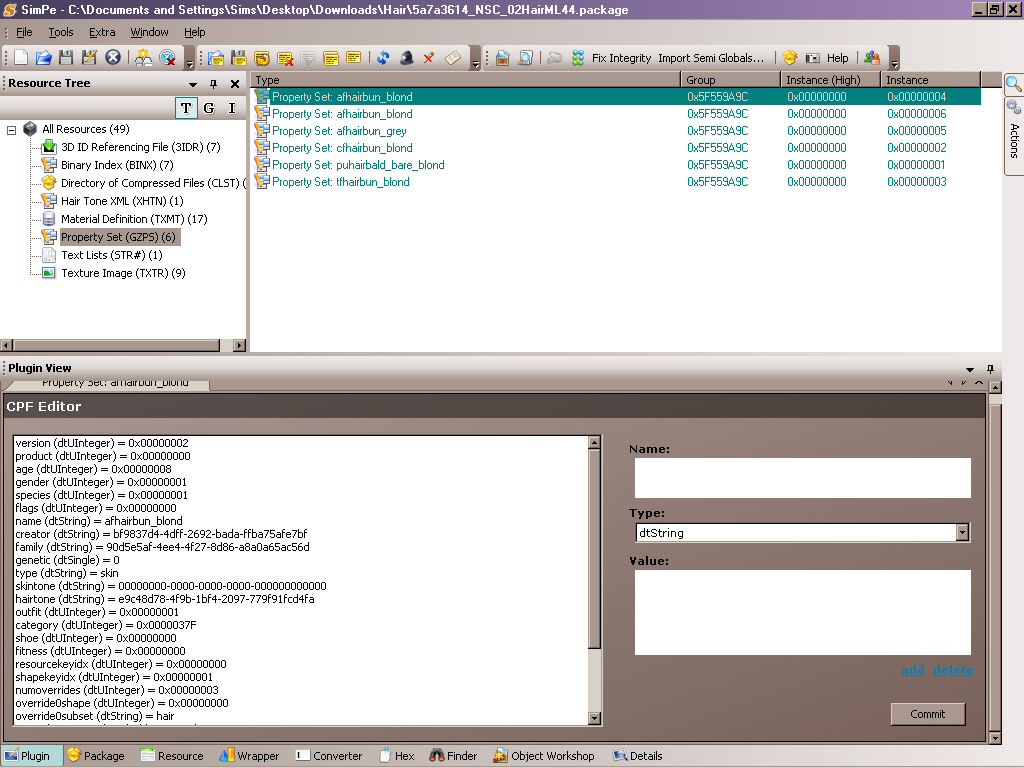
Click commit and you're all done!
The advanced guide will cover removing the unnecessary texture files and cleaning up the file in general. Doing this will usually reduce the file size at least by half ultimately making your game load faster.